Our developer, Tom, walks through how to create a feature that allows users to navigate to specifc points in a video using buttons within the content. Part 2
HeX’s Front-End Developer, Tom, talks us through how he ideated, created and finalised a solution for users to effectively navigate to specific sections of a video embedded on our website. This is part 2
You can view part one of the blog series here.
A neat button sits alongside a section of content that explains the section that is being navigated to, allowing the user to pinpoint the information that they would like to view, instead of having to trawl through an entire video
Knowledge required: To read, and be able to understand this blog, it is recommended that you are proficient in the following areas:
- WordPress
- HTML
- Javascript
- ACF Plugin
- PHP
It’s worth checking out the finished video feature here.
Following on from the first part of this blog series, this week I’m going demonstrate the layout of the template-part and the function used to control the HTML5 <video> <source> src URL and poster attributes.
The layout
We’re still using the standard Foundation Float grid here at Hex with a 12 column layout so nothing unusual going on here. We also wrap all the ACF calls in conditions to make sure no empty mark-up is rendered.
Foundation does provide some really useful helper classes when it comes to displaying a video on your websites. The responsive-embed class maintains any embedded content’s aspect ratio as the screen width changes when applied to a container for the embedded content.
The widescreen class used in conjunction with the responsive-embed class makes the container aspect ratio 16:9 and gives us a nice clean video at the top of the page.
Where appropriate, we also like to use BEM to keep our SASS nice and clean.
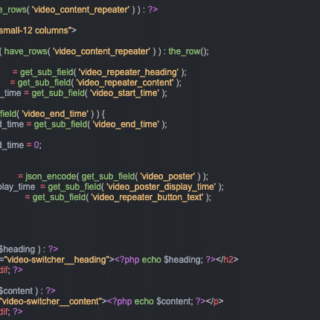
<section id="video-switcher">
  <div class="row">
    <div class="small-12 columns">

    <?php if( get_field( 'video_source' ) === 'media-library' ) : ?>

      <div id="videoContainer" class="responsive-embed widescreen">
        <video id="videoId" crossorigin="true" controls>
        <?php if( get_field( 'video_mp4_file' ) ) : ?>
          <source src="<?php the_field( 'video_mp4_file' ); ?>" class="video-switcher__source" type="video/mp4" >
        <?php endif; ?>
        <?php if( get_field( 'video_webm_file' ) ) : ?>
          <source src="<?php the_field( 'video_webm_file' ); ?>" class="video-switcher__source" type="video/webm" >
        <?php endif; ?>
        <?php if( get_field( 'video_webm_file' ) ) : ?>
          <source src="<?php the_field( 'video_webm_file' ); ?>" class="video-switcher__source" type="video/ogg" >
        <?php endif; ?>
        <?php if( get_field( 'video_caption_file' ) ) : ?>
          <track src="<?php the_field( 'video_caption_file' ); ?>" label="English" kind="captions" srclang="en" default>
        <?php endif; ?>
        </video>
        <div id="jsoverlay"></div>
      </div>
Why Vanilla JavaScript?
Before I go any further, I should mention that the function is built with Vanilla JS and not jQuery. First and foremost, I’ll admit to not knowing jQuery anywhere near as well as JavaScript, so it was going to be a much quicker build time. Recently I’ve also been really into what Chris Ferdinandi is advocating about the lean web and Vanilla JS so why use a library when you don’t have to.
The function
Most of the fields in the template part are being used to display content. However, the PHP variables from the repeater that we use to manipulate the <video> and <source> attributes are:
$video_start_time, $vide_end_time, $poster, $poster_display_timeAs mentioned in the previous blog, we’re making use of media fragments to append start/end times to the <source> src URL and this is where the first two parameters, startTime and endTime, get passed as arguments to our function changeVideoSource.
function changeVideoSource(startTime, endTime, videoPoster, posterDisplayTime)The function above is being called by the onclick event in the button within our template-part PHP file. The function actually resides in our app.js file which is compiled into app.min.js file and loaded via another function making use of the WordPress function wp_enqueue_script().
wp_enqueue_script( 'application', get_template_directory_uri() . '/assets/scripts/app.min.js', array(), filemtime(get_stylesheet_directory() . '/assets/scripts/app.min.js'), true );In the function we start by getting the <video> element by its ID which we will use at the end of the function.
// Get the video by the id in the template-part.
var video = document.getElementById('videoId');
We then get all the <source> elements within the <video> element.
// Get all the source elements within the video element.
var videoArray = document.getElementById('videoId').querySelectorAll('.video-switcher__source');
We then loop over the array and get the URL of the src attribute of each <source> element. While doing this there are two conditions to check if the URL already has a media fragment within it.
We require this check because there are multiple buttons on the page which all manipulate the URL e.g. if the first button has been pressed to play the video, the URL has a media fragment, so when you press play on the second button, we need to strip that media fragment and apply the new one. These checks are performed using a simple RegEx and the JS .match() string method.
Once either of these conditions is passed, we set the src of each element as the new URL with the media fragment defined by the user in the custom field.
// Loop over the <source> elements in the array.
  for(var i = 0; i < videoArray.length; i++) {

    // Get the src attribute URL.
    var videoUrl = videoArray[i].getAttribute('src');

    // Variables for assigning in the condition below.
    var trimmedVideoUrl = '';
    var videoUrlTimeStamp = '';

    // If the src attribute URL already contains a media fragment, remove it.
    if (videoUrl.match(/#t=/g)) {
        var mediaFragmentIndex = videoUrl.indexOf('#t=');
        trimmedVideoUrl = videoUrl.slice(0, mediaFragmentIndex);

        if (endTime === 0) {
            videoUrlTimeStamp = trimmedVideoUrl + '#t=' + startTime;
        } else {
            videoUrlTimeStamp = trimmedVideoUrl + '#t=' + startTime + ',' + endTime;
        }
    }

    // If the src attribute URL doesn't contain a media fragment, add one.
    if (videoUrl.match(/#t=/g) === null) {
        if (endTime === 0) {
            videoUrlTimeStamp = videoUrl + '#t=' + startTime;
        } else {
            videoUrlTimeStamp = videoUrl + '#t=' + startTime + ',' + endTime;
        }
    }
    // Set the src attribute as the original URL with the media fragment appended.
    videoArray[i].setAttribute('src', videoUrlTimeStamp);
  }
The final part of this function relates to the video poster attribute as in the WordPress CMS.
We have given the user the option of loading a new poster before each chunk of video is played and defining how long that poster is displayed for. This was actually one of the trickiest parts of the function to implement as we tried to manipulate the src URL of the poster attribute which proved impossible, so a workaround had to be found.
We ended up using a background image as a <div> overlay and then applied inline CSS using JavaScript and the setTimeout method to display the poster for as long as the user defined in the custom field using the argument passed as posterDisplayTime.
// Apply the video poster image as a background image.
  if (videoPoster && posterDisplayTime) {
    document.getElementById('jsoverlay').setAttribute('style', "background-image: url('" + videoPoster + "'); display: block");

    // User inputted length of time to display poster.
    setTimeout(function() {
        document.getElementById('jsoverlay').setAttribute('style',"display: none" );
        video.load();
        video.play();
    }, posterDisplayTime * 1000);
  } else {
    // 1 second delay to allow for scrolling to video.
    setTimeout(function() {
        video.load();
        video.play();
    }, 1000);
  }
The SASS for this is straight forward, nothing more to see here!
// Overlay to display video posters between timestamps.
#videoContainer {
  position: relative;

  #jsoverlay {
    position: absolute;
    left: 0;
    right: 0;
    top: 0;
    bottom: 0;
    background-size: cover;
    display: none;
  }
}
We then .load(); and play(); methods on the video variable we defined at the very beginning of the function to reload and the play the video element with the updated URL containing the media fragments. The mark-up and function resulted in the following layout:

In the next blog, I’ll be showing you how we worked with the YouTube API to do something very similar as well as pulling the final mark-up and JS together.
Next in the series…